{{höfundur}}
{{útdráttur orð = "100"}} ... Lestu meira
{{{pagination}}}
{{/ if}} The blogga vettvangur Ghost hefur verið að fá mikla athygli undanfarið vegna nýlegrar hreyfingar hennar frá beta til opinberrar útgáfu (ef þú hefur einhvern veginn ekki heyrt um það ennþá, höfuð hérna og lesið upp).
Eins og aðrar vettvangar, styður Ghost þemu þriðja aðila. Í þessari grein munum við hanna einfalt, móttækilegt og innihaldstengt blogg. Kóðaðu síðan það í fullkomlega hagnýtt þema fyrir Ghost.
Sjálfgefið þema fyrir Ghost, 'Casper', er mjög hreint útlit. Þeir setja efni fyrst og sýna fram á leturgerðina með nútíma litavali, þannig að áherslan sé lögð á ritunina.
Við ætlum að fylgja því sem leiða, þannig að hönnun okkar ferli þarf að byrja með því að skilja hvernig Ghost virkar og hvað er aðgengilegt fyrir notandann í bakhliðinni. Það eru 4 meginþættir sem við munum geta tekið á frá bakhliðinni við hönnun þemunnar (fyrir utan greinar / færslur sjálfir augljóslega) sem eru:
Allt sem hægt er að setja á flipann Stillingar í Ghost. Þetta benti á hönnunina í augljósri átt einhvers konar borði efst á síðunni, sem inniheldur heiti, lógó og lýsingu og kápa mynd sem bakgrunn.
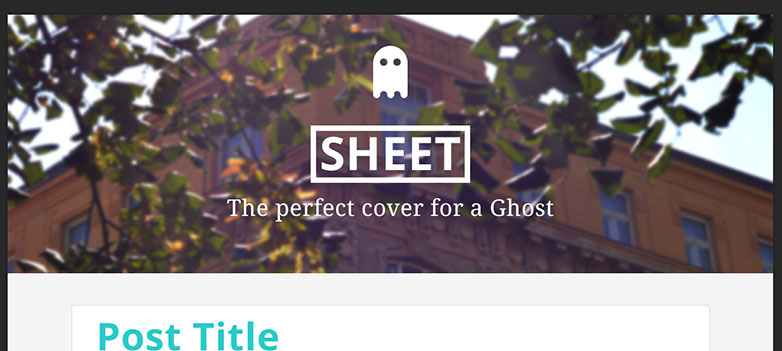
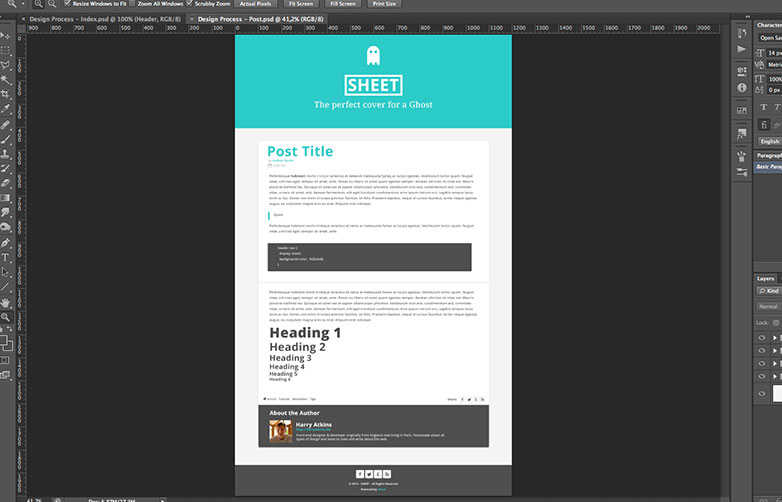
Þannig að við verðum aðeins að hanna 2 síður, það er heimasíðan, sem sýnir allar nýjustu færslur og einstaklingsins síðu. Þar sem hönnunin er tiltölulega einföld, mun ég sýna lokið síðu fyrst, þá fara yfir upplýsingarnar aftur. Svo hér er "heimasíða" sem sýnir nýjustu færslur:

Svo sem þú getur séð, litrík hápunktur, ásamt undirstöðu og hreinum hönnun. Við skulum hlaupa yfir upplýsingarnar aftur. Þannig að við höfum fengið hausinn, sem inniheldur merkið (hér hef ég búið til smá lak búning fyrir draug), nafnið á blogginu og lýsingunni.
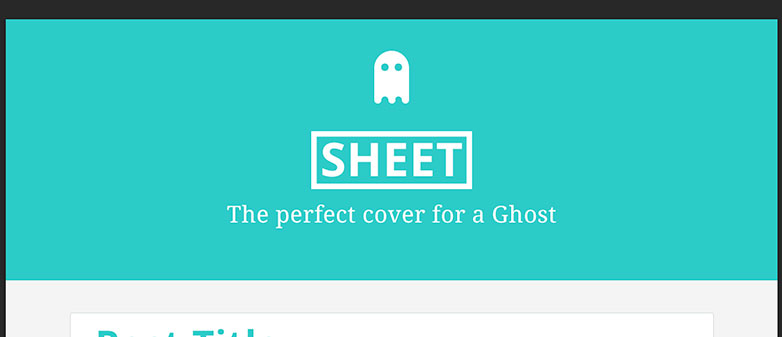
Svo ef notandinn velur kápa mynd munum við setja það inn sem fullbreiddar bakgrunnsmynd hér. Ef ekki munum við fara í solid bláan lit sem verður hápunktur liturinn okkar eins og að ofan.
Síðan höfum við nokkra innihaldsefni þar sem við munum sýna allar upplýsingar um hverja færslu (titill, birt date, höfundur, merkingar) og útdrátturinn.
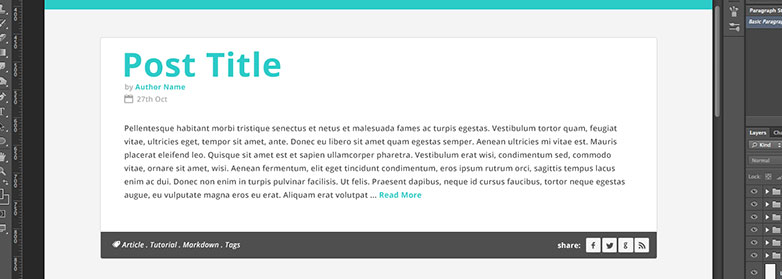
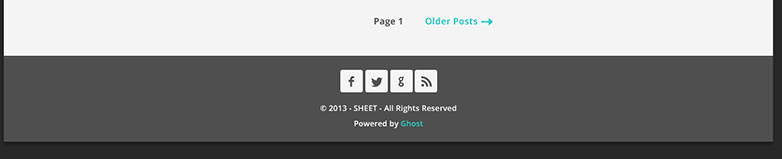
Að lokum gerum við einfalda pagination hlekkur og fót. Í hlutanum hlutdeildarskírteini, fóturinn og allt um síðuna sem við erum að nota sérsniðið leturgerð sem gerð er á Fontello og letrið Opið Sans frá Google Web Fonts. Sem sjáum við hvernig á að framkvæma síðar.
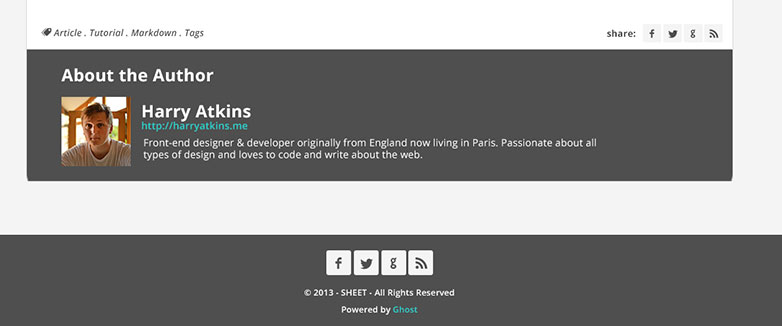
Þessi hönnun er mjög svipuð heimasíðunni. Nema blokkin sem við fylgdum útdrættinu áður mun nú teygja í fullri hæð og sýna allt efni. Auk þess munum við bæta við höfundarriti neðst.
Svo allt það sama, í sundur frá einhverjum innlínum texta stíl sem við munum fara yfir í þróun stigi. Og hér er nýjan rithöfundur kassi:
Allt í lagi, svo nú hefur hönnunin verið skoðuð (og aðlaga það að eigin vali). Það er kominn tími til að byrja á þróuninni. Fyrst af öllu, ef þú hefur ekki þegar gert það skaltu taka annað og lesa opinbera drauginn skjöl um þema sköpun. Þau eru mjög skýr og nákvæm um hvað er þörf og skrá uppbygging og svo framvegis. Í grundvallaratriðum fyrir þessa einkatími getum við skipt þróuninni í tvo stig. Innihald og stíl. Eins og grunntengsl milli HTML og CSS, munum við gera þemavinnuna, þá líta það út eins og hönnun okkar.
Til að byrja þarftu að hafa Ghost uppsett á staðnum á vélinni þinni. Þetta er tiltölulega beinn áfram að gera, og nú eru jafnvel sjálfvirkir embættismenn (eins og þessi ). Þegar það er sett upp og hlaupið þarftu að finna draugamappa sem heitir 'ghost-version.number' (þegar það er skrifað er 'draugur-0.3.2'). Einu sinni staðsett, flettu að 'efni / þemu' þar sem þú vilt búa til nýja möppu sem heitir þemað þitt. Svo í þessu tilfelli munum við kalla það 'blað'. Innan þessa möppu erum við að fara að búa til 2 skrár sem eru nauðsynlegar fyrir draugþema. Það er 'index.hbs' og 'post.hbs', ef þú hefur lesið Ghost-skjölin (eða notað Handlebars annars staðar) þá munuð þið viðurkenna skráarsniðið '.hbs' sem þýðir að við getum notað svokallaða "handbækur" : {{}} í sniðmátinu okkar.
Eftir það munum við bæta við öðrum skrá sem kallast 'default.hbs' og mappa uppbygging fyrir eignir okkar og hluta skrár. Fylgdu þessari skráareiningu:
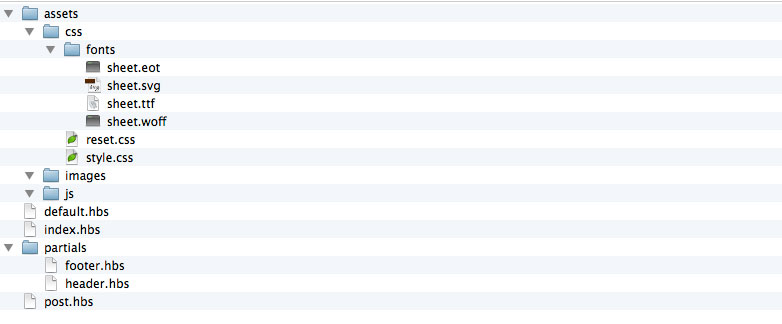
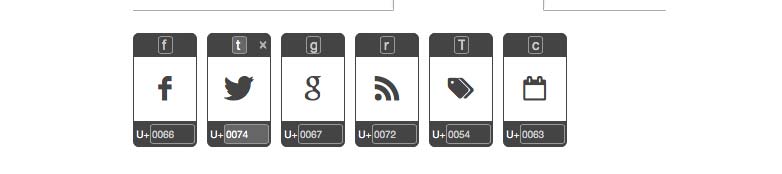
Við 'eignir / css / letur' munum við setja leturgerðarsniðið okkar fyrir forritið @ font-face. Fyrir þessa hönnun hef ég aðeins valið 6 tákn: Facebook, Twitter, Google, RSS, Merki, Dagbók.
Burtséð frá því eru restin af skrám nokkuð sjálfsskýringar. Nú skulum við komast inn í kóðann. Við munum líta fyrst á tvö nauðsynleg skrá í þemaðinu.
Hvað varðar hönnunin, mun ég gefa allt innihald skráarinnar fyrst, þá munum við brjóta upp mikilvægu bita. Fyrst af öllu skránni 'index.hbs':
{{!< default}}{{> header}}{{#foreach posts}}{{höfundur}}
{{útdráttur orð = "100"}} ... Lestu meira
{{/ foreach}} {{# ef pagination}} {{{pagination}}} {{/ if}} {{> fótur}} So to explain what's happening, the very first line is essential to the theme and tell us that this file will be inserted into the content area into the default file. The second line then inserts our header. Instead of putting it into this file we'll create a partial file later in the 'partials' directory. HBS files are just like HTML files in which you can include normal HTML elements. So the next element in the file is a which will hold all of our main content. Then inside of the repeater we'll put our article element that will contain the post. Inside each there will be a with the title and the meta data of the article (author and publish date). After that the actual excerpt. Then a that has our post's tags (in between an 'if' statement) and the share links, with some span's calling in our icon font. Finally we have some pagination, and we eventually call in the which works like the header. So as you can see it's relatively simple code. Obviously any class or ID names are optional for CSS styling. Next up comes the 'post.hbs' file. Which is mostly similar, but with a few additions and modifications. /">← Go Back {{title}} by {{author}} {{date format='DD MMM YYYY'}} {{content}} {{#if tags}} Tags: {{tags separator=" . "}} {{/if}} Share: {{#if author}} About the Author {{#if author.image}} {{/if}} {{author.name}} {{#if author.website}} {{author.website}} {{/if}} {{author.bio}} {{/if}}{{/post}} {{> footer}} Once again we have the and handlebars. And our element. But this time the wrapping handlebar is Then we call in the (Not excerpt, because this is the individual page we want to show all of the content in the post.) Another difference here is the 'if' statement which is verifying if there's an author for the post. If there is we'll show a box with the author's image, name, URL and bio. All of these elements are editable in the back-end by the user, and will either show up or not depending on whether they exist. 'default.hbs' and the partial files Now we're going to look at the default.hbs file. So if you haven't made it yet, create a new file. In that file we're going to put all the default things that are needed for our page to display correctly in a browser, mainly the doctype and the , and tags. {{ghost_head}} {{{body}}} {{ghost_foot}}
{{!< default}} So to explain what's happening, the very first line is essential to the theme and tell us that this file will be inserted into the content area into the default file. The second line then inserts our header. Instead of putting it into this file we'll create a partial file later in the 'partials' directory. HBS files are just like HTML files in which you can include normal HTML elements. So the next element in the file is a which will hold all of our main content. Then inside of the repeater we'll put our article element that will contain the post. Inside each there will be a with the title and the meta data of the article (author and publish date). After that the actual excerpt. Then a that has our post's tags (in between an 'if' statement) and the share links, with some span's calling in our icon font. Finally we have some pagination, and we eventually call in the which works like the header. So as you can see it's relatively simple code. Obviously any class or ID names are optional for CSS styling. Next up comes the 'post.hbs' file. Which is mostly similar, but with a few additions and modifications. /">← Go Back {{title}} by {{author}} {{date format='DD MMM YYYY'}} {{content}} {{#if tags}} Tags: {{tags separator=" . "}} {{/if}} Share: {{#if author}} About the Author {{#if author.image}} {{/if}} {{author.name}} {{#if author.website}} {{author.website}} {{/if}} {{author.bio}} {{/if}}{{/post}} {{> footer}} Once again we have the and handlebars. And our element. But this time the wrapping handlebar is Then we call in the (Not excerpt, because this is the individual page we want to show all of the content in the post.) Another difference here is the 'if' statement which is verifying if there's an author for the post. If there is we'll show a box with the author's image, name, URL and bio. All of these elements are editable in the back-end by the user, and will either show up or not depending on whether they exist. 'default.hbs' and the partial files Now we're going to look at the default.hbs file. So if you haven't made it yet, create a new file. In that file we're going to put all the default things that are needed for our page to display correctly in a browser, mainly the doctype and the , and tags. {{ghost_head}} {{{body}}} {{ghost_foot}}
{{> header}} So to explain what's happening, the very first line is essential to the theme and tell us that this file will be inserted into the content area into the default file. The second line then inserts our header. Instead of putting it into this file we'll create a partial file later in the 'partials' directory. HBS files are just like HTML files in which you can include normal HTML elements. So the next element in the file is a which will hold all of our main content. Then inside of the repeater we'll put our article element that will contain the post. Inside each there will be a with the title and the meta data of the article (author and publish date). After that the actual excerpt. Then a that has our post's tags (in between an 'if' statement) and the share links, with some span's calling in our icon font. Finally we have some pagination, and we eventually call in the which works like the header. So as you can see it's relatively simple code. Obviously any class or ID names are optional for CSS styling. Next up comes the 'post.hbs' file. Which is mostly similar, but with a few additions and modifications. /">← Go Back {{title}} by {{author}} {{date format='DD MMM YYYY'}} {{content}} {{#if tags}} Tags: {{tags separator=" . "}} {{/if}} Share: {{#if author}} About the Author {{#if author.image}} {{/if}} {{author.name}} {{#if author.website}} {{author.website}} {{/if}} {{author.bio}} {{/if}}{{/post}} {{> footer}} Once again we have the and handlebars. And our element. But this time the wrapping handlebar is Then we call in the (Not excerpt, because this is the individual page we want to show all of the content in the post.) Another difference here is the 'if' statement which is verifying if there's an author for the post. If there is we'll show a box with the author's image, name, URL and bio. All of these elements are editable in the back-end by the user, and will either show up or not depending on whether they exist. 'default.hbs' and the partial files Now we're going to look at the default.hbs file. So if you haven't made it yet, create a new file. In that file we're going to put all the default things that are needed for our page to display correctly in a browser, mainly the doctype and the , and tags. {{ghost_head}} {{{body}}} {{ghost_foot}}
{{/if}} {{author.name}} {{#if author.website}} {{author.website}} {{/if}} {{author.bio}} {{/if}}{{/post}} {{> footer}} Once again we have the and handlebars. And our element. But this time the wrapping handlebar is Then we call in the (Not excerpt, because this is the individual page we want to show all of the content in the post.) Another difference here is the 'if' statement which is verifying if there's an author for the post. If there is we'll show a box with the author's image, name, URL and bio. All of these elements are editable in the back-end by the user, and will either show up or not depending on whether they exist. 'default.hbs' and the partial files Now we're going to look at the default.hbs file. So if you haven't made it yet, create a new file. In that file we're going to put all the default things that are needed for our page to display correctly in a browser, mainly the doctype and the , and tags. {{ghost_head}} {{{body}}} {{ghost_foot}}
{{#foreach posts}} So to explain what's happening, the very first line is essential to the theme and tell us that this file will be inserted into the content area into the default file. The second line then inserts our header. Instead of putting it into this file we'll create a partial file later in the 'partials' directory. HBS files are just like HTML files in which you can include normal HTML elements. So the next element in the file is a which will hold all of our main content. Then inside of the repeater we'll put our article element that will contain the post. Inside each there will be a with the title and the meta data of the article (author and publish date). After that the actual excerpt. Then a that has our post's tags (in between an 'if' statement) and the share links, with some span's calling in our icon font. Finally we have some pagination, and we eventually call in the which works like the header. So as you can see it's relatively simple code. Obviously any class or ID names are optional for CSS styling. Next up comes the 'post.hbs' file. Which is mostly similar, but with a few additions and modifications. /">← Go Back {{title}} by {{author}} {{date format='DD MMM YYYY'}} {{content}} {{#if tags}} Tags: {{tags separator=" . "}} {{/if}} Share: {{#if author}} About the Author {{#if author.image}} {{/if}} {{author.name}} {{#if author.website}} {{author.website}} {{/if}} {{author.bio}} {{/if}}{{/post}} {{> footer}} Once again we have the and handlebars. And our element. But this time the wrapping handlebar is Then we call in the (Not excerpt, because this is the individual page we want to show all of the content in the post.) Another difference here is the 'if' statement which is verifying if there's an author for the post. If there is we'll show a box with the author's image, name, URL and bio. All of these elements are editable in the back-end by the user, and will either show up or not depending on whether they exist. 'default.hbs' and the partial files Now we're going to look at the default.hbs file. So if you haven't made it yet, create a new file. In that file we're going to put all the default things that are needed for our page to display correctly in a browser, mainly the doctype and the , and tags. {{ghost_head}} {{{body}}} {{ghost_foot}}
{{/if}} {{author.name}} {{#if author.website}} {{author.website}} {{/if}} {{author.bio}} {{/if}}{{/post}} {{> footer}} Once again we have the and handlebars. And our element. But this time the wrapping handlebar is Then we call in the (Not excerpt, because this is the individual page we want to show all of the content in the post.) Another difference here is the 'if' statement which is verifying if there's an author for the post. If there is we'll show a box with the author's image, name, URL and bio. All of these elements are editable in the back-end by the user, and will either show up or not depending on whether they exist. 'default.hbs' and the partial files Now we're going to look at the default.hbs file. So if you haven't made it yet, create a new file. In that file we're going to put all the default things that are needed for our page to display correctly in a browser, mainly the doctype and the , and tags. {{ghost_head}} {{{body}}} {{ghost_foot}}
{{/if}} {{author.name}} {{#if author.website}} {{author.website}} {{/if}} {{author.bio}} {{/if}}{{/post}} {{> footer}} Once again we have the and handlebars. And our element. But this time the wrapping handlebar is Then we call in the (Not excerpt, because this is the individual page we want to show all of the content in the post.) Another difference here is the 'if' statement which is verifying if there's an author for the post. If there is we'll show a box with the author's image, name, URL and bio. All of these elements are editable in the back-end by the user, and will either show up or not depending on whether they exist. 'default.hbs' and the partial files Now we're going to look at the default.hbs file. So if you haven't made it yet, create a new file. In that file we're going to put all the default things that are needed for our page to display correctly in a browser, mainly the doctype and the , and tags. {{ghost_head}} {{{body}}} {{ghost_foot}}
{{> footer}} So to explain what's happening, the very first line is essential to the theme and tell us that this file will be inserted into the content area into the default file. The second line then inserts our header. Instead of putting it into this file we'll create a partial file later in the 'partials' directory. HBS files are just like HTML files in which you can include normal HTML elements. So the next element in the file is a which will hold all of our main content. Then inside of the repeater we'll put our article element that will contain the post. Inside each there will be a with the title and the meta data of the article (author and publish date). After that the actual excerpt. Then a that has our post's tags (in between an 'if' statement) and the share links, with some span's calling in our icon font. Finally we have some pagination, and we eventually call in the which works like the header. So as you can see it's relatively simple code. Obviously any class or ID names are optional for CSS styling. Next up comes the 'post.hbs' file. Which is mostly similar, but with a few additions and modifications. /">← Go Back {{title}} by {{author}} {{date format='DD MMM YYYY'}} {{content}} {{#if tags}} Tags: {{tags separator=" . "}} {{/if}} Share: {{#if author}} About the Author {{#if author.image}} {{/if}} {{author.name}} {{#if author.website}} {{author.website}} {{/if}} {{author.bio}} {{/if}}{{/post}} {{> footer}} Once again we have the and handlebars. And our element. But this time the wrapping handlebar is Then we call in the (Not excerpt, because this is the individual page we want to show all of the content in the post.) Another difference here is the 'if' statement which is verifying if there's an author for the post. If there is we'll show a box with the author's image, name, URL and bio. All of these elements are editable in the back-end by the user, and will either show up or not depending on whether they exist. 'default.hbs' and the partial files Now we're going to look at the default.hbs file. So if you haven't made it yet, create a new file. In that file we're going to put all the default things that are needed for our page to display correctly in a browser, mainly the doctype and the , and tags. {{ghost_head}} {{{body}}} {{ghost_foot}}
So to explain what's happening, the very first line is essential to the theme and tell us that this file will be inserted into the content area into the default file. The second line then inserts our header. Instead of putting it into this file we'll create a partial file later in the 'partials' directory. HBS files are just like HTML files in which you can include normal HTML elements. So the next element in the file is a which will hold all of our main content. Then inside of the repeater we'll put our article element that will contain the post. Inside each there will be a with the title and the meta data of the article (author and publish date). After that the actual excerpt. Then a that has our post's tags (in between an 'if' statement) and the share links, with some span's calling in our icon font. Finally we have some pagination, and we eventually call in the which works like the header. So as you can see it's relatively simple code. Obviously any class or ID names are optional for CSS styling. Next up comes the 'post.hbs' file. Which is mostly similar, but with a few additions and modifications. /">← Go Back {{title}} by {{author}} {{date format='DD MMM YYYY'}} {{content}} {{#if tags}} Tags: {{tags separator=" . "}} {{/if}} Share: {{#if author}} About the Author {{#if author.image}} {{/if}} {{author.name}} {{#if author.website}} {{author.website}} {{/if}} {{author.bio}} {{/if}}{{/post}} {{> footer}} Once again we have the and handlebars. And our element. But this time the wrapping handlebar is Then we call in the (Not excerpt, because this is the individual page we want to show all of the content in the post.) Another difference here is the 'if' statement which is verifying if there's an author for the post. If there is we'll show a box with the author's image, name, URL and bio. All of these elements are editable in the back-end by the user, and will either show up or not depending on whether they exist. 'default.hbs' and the partial files Now we're going to look at the default.hbs file. So if you haven't made it yet, create a new file. In that file we're going to put all the default things that are needed for our page to display correctly in a browser, mainly the doctype and the , and tags. {{ghost_head}} {{{body}}} {{ghost_foot}}
{{!< default}}{{> header}}{{#post}}{{{url}}}">{{title}} by {{author}} {{date format='DD MMM YYYY'}} {{content}} {{#if tags}} Tags: {{tags separator=" . "}} {{/if}} Share: {{#if author}} About the Author {{#if author.image}} {{/if}} {{author.name}} {{#if author.website}} {{author.website}} {{/if}} {{author.bio}} {{/if}}{{/post}} {{> footer}} Once again we have the and handlebars. And our element. But this time the wrapping handlebar is Then we call in the (Not excerpt, because this is the individual page we want to show all of the content in the post.) Another difference here is the 'if' statement which is verifying if there's an author for the post. If there is we'll show a box with the author's image, name, URL and bio. All of these elements are editable in the back-end by the user, and will either show up or not depending on whether they exist. 'default.hbs' and the partial files Now we're going to look at the default.hbs file. So if you haven't made it yet, create a new file. In that file we're going to put all the default things that are needed for our page to display correctly in a browser, mainly the doctype and the , and tags. {{ghost_head}} {{{body}}} {{ghost_foot}}
So to explain what's happening, the very first line is essential to the theme and tell us that this file will be inserted into the content area into the default file. The second line then inserts our header. Instead of putting it into this file we'll create a partial file later in the 'partials' directory. HBS files are just like HTML files in which you can include normal HTML elements. So the next element in the file is a which will hold all of our main content. Then inside of the repeater we'll put our article element that will contain the post. Inside each there will be a with the title and the meta data of the article (author and publish date). After that the actual excerpt. Then a that has our post's tags (in between an 'if' statement) and the share links, with some span's calling in our icon font. Finally we have some pagination, and we eventually call in the which works like the header. So as you can see it's relatively simple code. Obviously any class or ID names are optional for CSS styling. Next up comes the 'post.hbs' file. Which is mostly similar, but with a few additions and modifications. /">← Go Back {{title}} by {{author}} {{date format='DD MMM YYYY'}} {{content}} {{#if tags}} Tags: {{tags separator=" . "}} {{/if}} Share: {{#if author}} About the Author {{#if author.image}}
So to explain what's happening, the very first line is essential to the theme and tell us that this file will be inserted into the content area into the default file. The second line then inserts our header. Instead of putting it into this file we'll create a partial file later in the 'partials' directory. HBS files are just like HTML files in which you can include normal HTML elements. So the next element in the file is a which will hold all of our main content. Then inside of the repeater we'll put our article element that will contain the post. Inside each there will be a with the title and the meta data of the article (author and publish date). After that the actual excerpt. Then a that has our post's tags (in between an 'if' statement) and the share links, with some span's calling in our icon font. Finally we have some pagination, and we eventually call in the which works like the header. So as you can see it's relatively simple code. Obviously any class or ID names are optional for CSS styling. Next up comes the 'post.hbs' file. Which is mostly similar, but with a few additions and modifications. /">← Go Back {{title}} by {{author}} {{date format='DD MMM YYYY'}} {{content}} {{#if tags}} Tags: {{tags separator=" . "}} {{/if}} Share: {{#if author}} About the Author {{#if author.image}}
So to explain what's happening, the very first line is essential to the theme and tell us that this file will be inserted into the content area into the default file. The second line then inserts our header. Instead of putting it into this file we'll create a partial file later in the 'partials' directory. HBS files are just like HTML files in which you can include normal HTML elements. So the next element in the file is a which will hold all of our main content. Then inside of the repeater we'll put our article element that will contain the post. Inside each there will be a with the title and the meta data of the article (author and publish date). After that the actual excerpt. Then a that has our post's tags (in between an 'if' statement) and the share links, with some span's calling in our icon font. Finally we have some pagination, and we eventually call in the which works like the header. So as you can see it's relatively simple code. Obviously any class or ID names are optional for CSS styling. Next up comes the 'post.hbs' file. Which is mostly similar, but with a few additions and modifications. /">← Go Back {{title}} by {{author}} {{date format='DD MMM YYYY'}} {{content}} {{#if tags}} Tags: {{tags separator=" . "}} {{/if}} Share: {{#if author}} About the Author {{#if author.image}}So to explain what's happening, the very first line is essential to the theme and tell us that this file will be inserted into the content area into the default file. The second line then inserts our header. Instead of putting it into this file we'll create a partial file later in the 'partials' directory. HBS files are just like HTML files in which you can include normal HTML elements. So the next element in the file is a which will hold all of our main content. Then inside of the repeater we'll put our article element that will contain the post. Inside each there will be a with the title and the meta data of the article (author and publish date). After that the actual excerpt. Then a that has our post's tags (in between an 'if' statement) and the share links, with some span's calling in our icon font. Finally we have some pagination, and we eventually call in the which works like the header. So as you can see it's relatively simple code. Obviously any class or ID names are optional for CSS styling. Next up comes the 'post.hbs' file. Which is mostly similar, but with a few additions and modifications. /">← Go Back {{title}} by {{author}} {{date format='DD MMM YYYY'}} {{content}} {{#if tags}} Tags: {{tags separator=" . "}} {{/if}} Share: {{#if author}} About the Author {{#if author.image}}So to explain what's happening, the very first line is essential to the theme and tell us that this file will be inserted into the content area into the default file. The second line then inserts our header. Instead of putting it into this file we'll create a partial file later in the 'partials' directory. HBS files are just like HTML files in which you can include normal HTML elements. So the next element in the file is a which will hold all of our main content. Then inside of the repeater we'll put our article element that will contain the post. Inside each there will be a with the title and the meta data of the article (author and publish date). After that the actual excerpt. Then a that has our post's tags (in between an 'if' statement) and the share links, with some span's calling in our icon font. Finally we have some pagination, and we eventually call in the which works like the header. So as you can see it's relatively simple code. Obviously any class or ID names are optional for CSS styling. Next up comes the 'post.hbs' file. Which is mostly similar, but with a few additions and modifications. /">← Go Back {{title}} by {{author}} {{date format='DD MMM YYYY'}} {{content}} {{#if tags}} Tags: {{tags separator=" . "}} {{/if}} Share: {{#if author}} About the Author {{#if author.image}}So to explain what's happening, the very first line is essential to the theme and tell us that this file will be inserted into the content area into the default file. The second line then inserts our header. Instead of putting it into this file we'll create a partial file later in the 'partials' directory. HBS files are just like HTML files in which you can include normal HTML elements. So the next element in the file is a which will hold all of our main content. Then inside of the repeater we'll put our article element that will contain the post. Inside each there will be a with the title and the meta data of the article (author and publish date). After that the actual excerpt. Then a that has our post's tags (in between an 'if' statement) and the share links, with some span's calling in our icon font. Finally we have some pagination, and we eventually call in the which works like the header. So as you can see it's relatively simple code. Obviously any class or ID names are optional for CSS styling. Next up comes the 'post.hbs' file. Which is mostly similar, but with a few additions and modifications. /">← Go Back {{title}} by {{author}} {{date format='DD MMM YYYY'}} {{content}} {{#if tags}} Tags: {{tags separator=" . "}} {{/if}} Share: {{#if author}} About the Author {{#if author.image}}So to explain what's happening, the very first line is essential to the theme and tell us that this file will be inserted into the content area into the default file. The second line then inserts our header. Instead of putting it into this file we'll create a partial file later in the 'partials' directory. HBS files are just like HTML files in which you can include normal HTML elements. So the next element in the file is a which will hold all of our main content. Then inside of the repeater we'll put our article element that will contain the post. Inside each there will be a with the title and the meta data of the article (author and publish date). After that the actual excerpt. Then a that has our post's tags (in between an 'if' statement) and the share links, with some span's calling in our icon font. Finally we have some pagination, and we eventually call in the which works like the header. So as you can see it's relatively simple code. Obviously any class or ID names are optional for CSS styling. Next up comes the 'post.hbs' file. Which is mostly similar, but with a few additions and modifications. /">← Go Back {{title}} by {{author}} {{date format='DD MMM YYYY'}} {{content}} {{#if tags}} Tags: {{tags separator=" . "}} {{/if}} Share: {{#if author}} About the Author {{#if author.image}}